
Brown Butter Chocolate Chip Cookies: Easy, Chewy Homemade Recipe
Brown Butter Chocolate Chip Cookies: Easy, Chewy Homemade Recipe
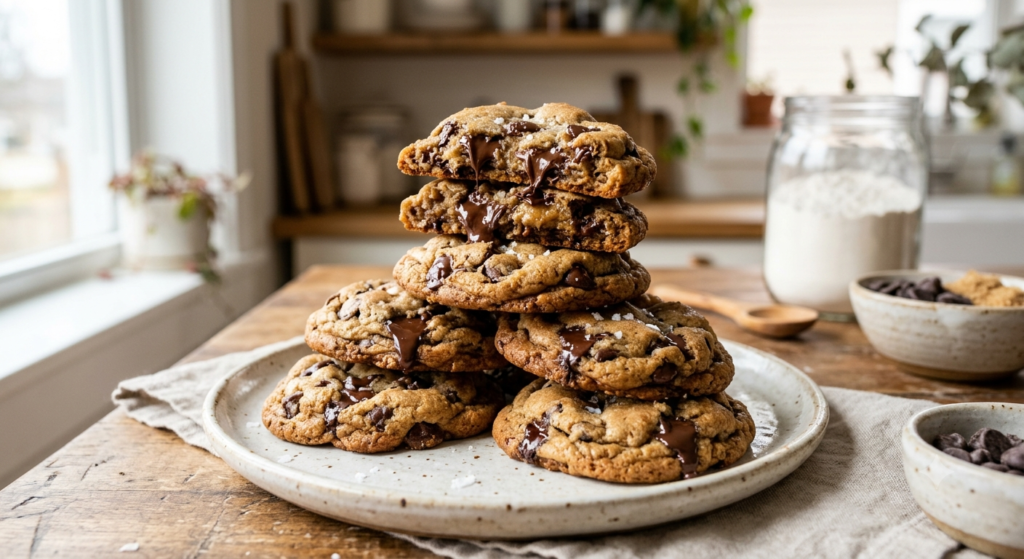
Brown Butter Chocolate Chip Cookies are a delicious twist on the classic homemade cookie. Browning the butter brings out a warm, nutty aroma with hints of caramel, giving every bite a deeper flavor than ordinary chocolate chip cookies. Combined with brown sugar, vanilla, and plenty of chocolate chips, these cookies have golden edges, soft centers, and irresistible pockets of melted chocolate.
This recipe is ideal for weekend baking, family treats, or whenever you want a fresh batch of homemade cookies. The ingredients are simple, and the extra step of browning the butter makes a noticeable difference. With a little chilling time and a few practical baking tips, you can make cookies that taste rich, look beautiful, and stay chewy in the middle.
Why This Recipe Is Special
The secret is browned butter. As butter melts and its milk solids toast, it develops a nutty fragrance and a rich, almost caramel-like flavor. Brown sugar adds moisture and chewiness, while granulated sugar helps the edges turn lightly crisp.
Chilling the dough gives the flour time to absorb moisture and helps control spreading in the oven. The result is a balanced cookie with a slightly crisp outside, a tender center, and plenty of chocolate in every bite.
Recipe Details
- Prep Time: 15 minutes
- Chilling Time: 30 minutes
- Cook Time: 10–12 minutes per batch
- Total Time: About 55–60 minutes, depending on batches
- Servings: Approximately 18 cookies
- Oven Temperature: 350°F (175°C)
Ingredients
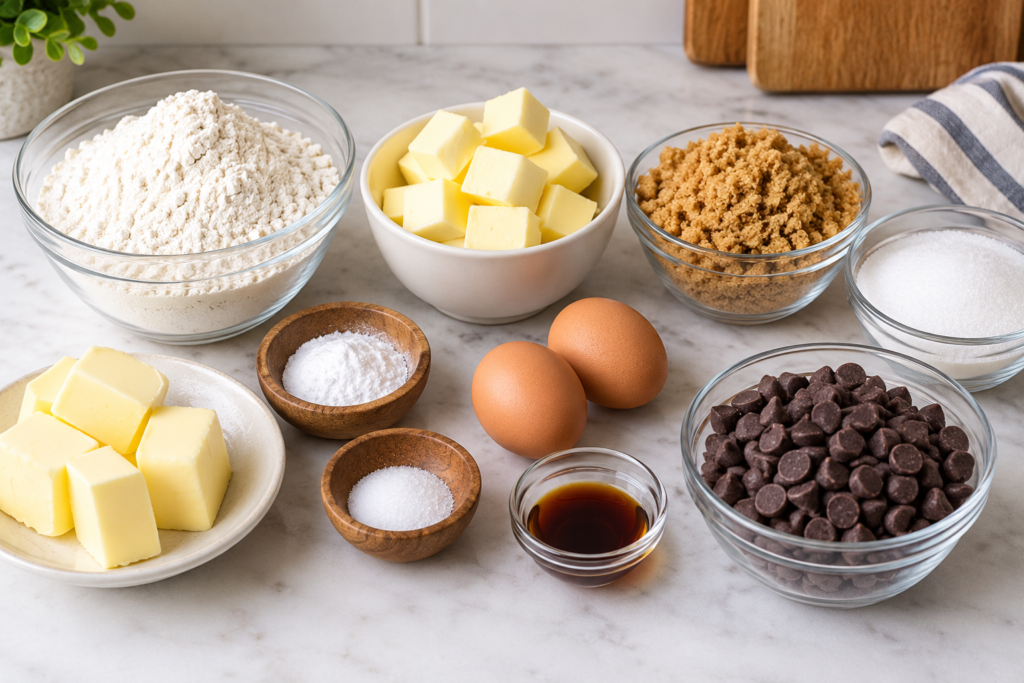
- 1 cup (226 g) unsalted butter
- 1 cup (200 g) packed brown sugar
- ½ cup (100 g) granulated white sugar
- 2 large eggs, at room temperature
- 2 teaspoons vanilla extract
- 2¼ cups (280 g) all-purpose flour, measured by weight
- 1 teaspoon baking soda
- ½ teaspoon salt
- 2 cups (340 g) semisweet chocolate chips
Optional: Reserve a small handful of chocolate chips to press onto the cookie dough balls before baking.
Step-by-Step Instructions
1. Brown the Butter
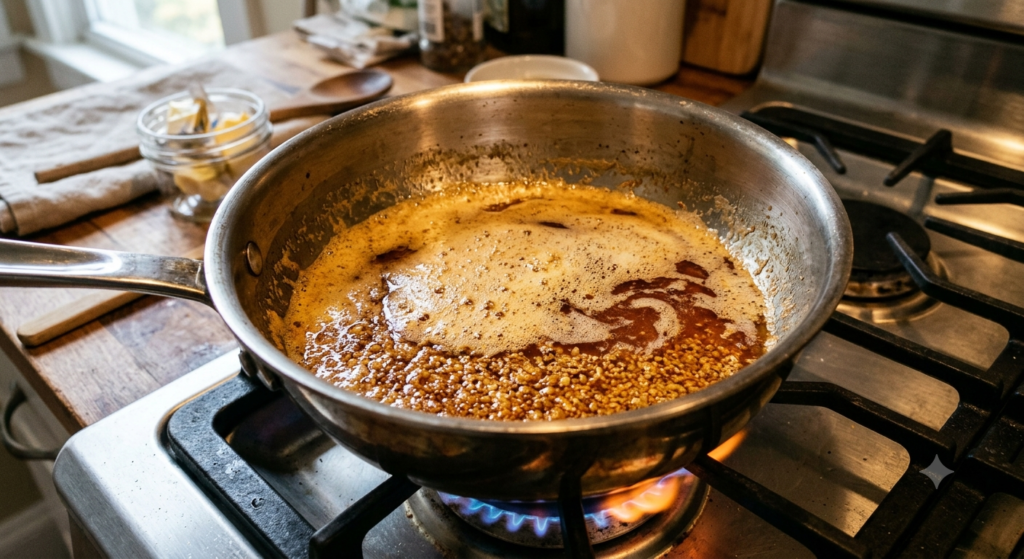
Cut the butter into pieces and place it in a light-colored saucepan over medium heat. Let it melt, stirring frequently as it begins to foam. Continue cooking for about 5–8 minutes, watching carefully as the milk solids turn golden brown and develop a nutty smell.
Small brown specks will form at the bottom of the pan. Remove the saucepan from the heat as soon as the butter smells toasted and the solids are amber, not black. Pour the butter, including the brown specks, into a heatproof bowl.
Let it cool for about 15–20 minutes until warm but not hot. This helps prevent the eggs from scrambling when they are added.
2. Mix the Wet Ingredients
Add the brown sugar and granulated sugar to the cooled browned butter. Whisk until evenly combined. Add the eggs and vanilla extract, then mix until the mixture looks smooth and glossy.
The browned butter may be liquid rather than creamy. That is normal for this recipe.
3. Combine the Dry Ingredients
In a separate bowl, whisk together the flour, baking soda, and salt. Add the dry ingredients to the butter mixture in two additions, stirring just until no dry flour remains.
Avoid overmixing. Too much mixing can develop excess gluten and make the cookies tougher.
4. Add the Chocolate Chips
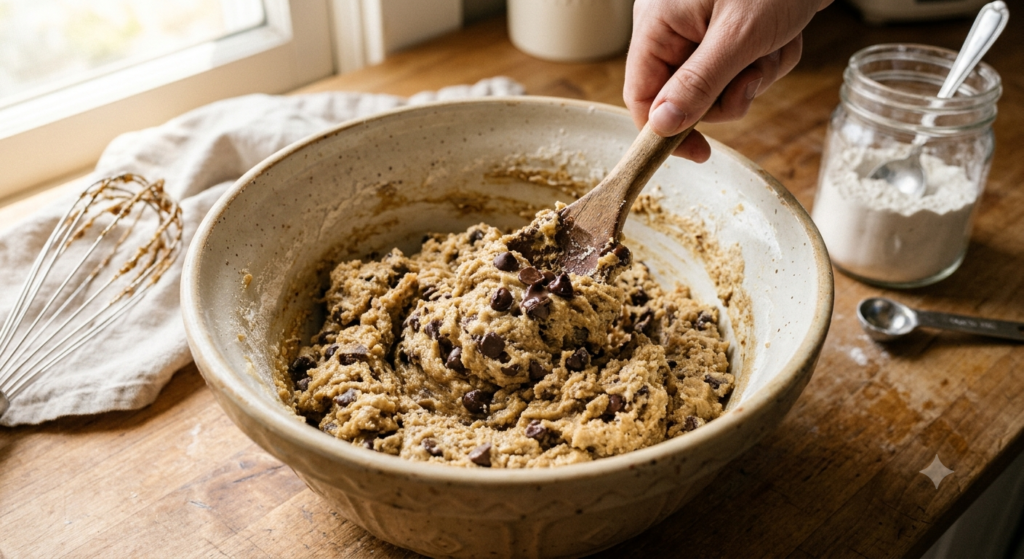
Fold the chocolate chips into the dough with a spatula, distributing them evenly. The dough should be thick and slightly sticky. If you like extra chocolate on top, save a few chips to press into the dough balls before baking.
5. Chill the Dough
Cover the bowl and refrigerate the dough for 30 minutes. Chilling helps the cookies spread less and allows the flavors to develop.
If preparing the dough ahead, refrigerate it for up to 24 hours. If it becomes very firm, let it sit at room temperature for 10–15 minutes before scooping.
6. Shape the Cookies
Preheat the oven to 350°F (175°C). Line a baking sheet with parchment paper. Scoop approximately 2 tablespoons of dough per cookie and arrange the portions about 2 inches apart.
For a bakery-style finish, gently press a few reserved chocolate chips onto each dough ball.
7. Bake Until the Edges Are Golden
Bake for 10–12 minutes, or until the edges are set and lightly golden while the centers still look a little soft. The cookies will continue to set as they cool, so avoid waiting until the centers look completely firm.
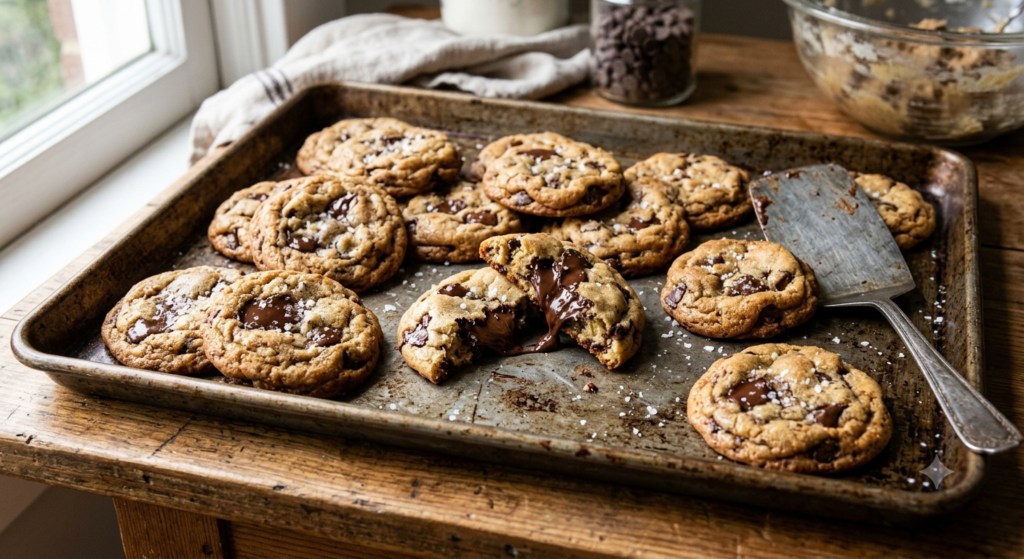
Leave the cookies on the baking sheet for 5 minutes, then transfer them to a wire rack. For the best texture, allow them to cool slightly before serving. The centers should remain soft and chewy, with lightly crisp edges and melted chocolate throughout.
Tips for Soft, Chewy Cookies
- Watch the butter closely: Browned butter should smell nutty and look amber, not dark brown or burnt.
- Cool the butter first: Hot butter can cook the eggs and change the dough’s texture.
- Measure flour accurately: Weighing flour is the most reliable method. Too much flour can make cookies dry.
- Chill the dough: Even 30 minutes can help reduce spreading.
- Do not overbake: Remove the cookies when the edges are set but the centers are still slightly soft.
- Use good-quality chocolate: Semisweet chocolate chips provide a balanced flavor against the sweet dough.
- Bake one test cookie: If it spreads too much, chill the remaining dough longer.
Common Mistakes and How to Avoid Them
Burning the butter: Butter can go from golden to burnt quickly. Use medium heat, stir often, and remove it from the stove as soon as the milk solids turn amber.
Adding eggs to hot butter: Let the browned butter cool before mixing in the eggs to avoid partially cooking them.
Skipping the chilling step: Warm dough often spreads more. Refrigerate it for at least 30 minutes for thicker cookies.
Adding too much flour: Extra flour can make cookies dense and dry. Use a kitchen scale or spoon flour into the measuring cup and level it without packing.
Overbaking the cookies: Cookies that look fully firm in the oven may become dry after cooling. Take them out when the edges are golden and the centers are still soft.
Placing dough balls too close together: Leave around 2 inches between portions so the cookies have room to spread.
Ingredient Substitutions
- Salted butter: You can use salted butter instead of unsalted butter. Reduce the added salt to about ¼ teaspoon.
- Dark brown sugar: This gives the cookies a deeper molasses flavor and a slightly chewier texture.
- Different chocolate: Use dark, milk, or chopped chocolate bars instead of semisweet chips.
- Gluten-free flour: A reliable 1:1 gluten-free baking blend may work, although the texture can vary by brand.
- Dairy-free alternative: A plant-based butter designed for baking may work, but browning and spreading can differ from dairy butter.
For the most reliable results, make one substitution at a time.
Storage and Reheating
Store completely cooled cookies in an airtight container at room temperature for up to 5 days. To help maintain softness, avoid leaving them uncovered.
For longer storage, place the baked cookies in a freezer-safe container or bag and freeze for up to 3 months. Thaw them at room temperature before serving.
You can also freeze individual portions of cookie dough. Place the dough balls on a tray until firm, then transfer them to a freezer-safe bag. Bake from frozen at 350°F (175°C), allowing a few extra minutes and checking for golden edges and soft centers.
To warm a baked cookie, microwave it for about 8–12 seconds. Alternatively, heat it in a 300°F (150°C) oven for around 4–5 minutes. Allow it to cool briefly before eating, as the chocolate may be very hot.
Frequently Asked Questions
Flat cookies can result from warm dough, too little flour, or butter that was still very warm when mixed. Chill the dough for at least 30 minutes and measure the flour carefully.
Chilling is strongly recommended for thicker cookies with better flavor. If you skip it, the cookies may spread more and turn out thinner.
Yes. Cover and refrigerate the dough for up to 24 hours. Let it soften slightly if it is too firm to scoop.
The butter will smell nutty, develop golden-amber color, and show small brown milk solids at the bottom of the pan. Remove it from the heat promptly to prevent burning.
Yes. Milk chocolate makes sweeter cookies, while dark chocolate gives a richer, less sweet result. You can also use a mixture of both.
That is usually a good sign. The centers continue to set from residual heat after the tray leaves the oven. Remove the cookies when the edges are set and lightly golden.
Yes. Freeze shaped dough balls in a sealed freezer-safe bag for up to 3 months for best quality. Bake from frozen, adding a few extra minutes as needed.
Conclusion
These Brown Butter Chocolate Chip Cookies combine the familiar comfort of homemade cookies with the deeper, nutty flavor of browned butter. With chewy centers, lightly crisp edges, and generous chocolate chips, they make a wonderful treat for sharing or enjoying fresh from the oven.
Take your time when browning the butter, chill the dough, and avoid overbaking. These simple steps help you make a delicious batch of chewy chocolate chip cookies whenever a homemade dessert is calling your name.